* [Fix] Update owners (#1248)

* [Docs] Update installation guide (#1254)

* [Docs] Update installation guide

* add pic

* minor fix

* fix

* [Docs] Update image link (#1255)

* [Docs] demo, experiments and live inference API on Tiyaro (#1272)

* docs: added Try on Tiyaro Badge

* docs: fix mdformat

* docs: update tiyaro docs url

Co-authored-by: Tong Gao <gaotongxiao@gmail.com>
Co-authored-by: Venkat Raman <vraman2811@gmail.com>
8.7 KiB
Installation
Prerequisites
- Linux | Windows | macOS
- Python 3.7
- PyTorch 1.6 or higher
- torchvision 0.7.0
- CUDA 10.1
- NCCL 2
- GCC 5.4.0 or higher
Environment Setup
If you are experienced with PyTorch and have already installed it, just skip this part and jump to the [next section](#installation-steps). Otherwise, you can follow these steps for the preparation.
Step 0. Download and install Miniconda from the official website.
Step 1. Create a conda environment and activate it.
conda create --name openmmlab python=3.8 -y
conda activate openmmlab
Step 2. Install PyTorch following official instructions, e.g.
On GPU platforms:
conda install pytorch torchvision -c pytorch
On CPU platforms:
conda install pytorch torchvision cpuonly -c pytorch
Installation Steps
We recommend that users follow our best practices to install MMOCR. However, the whole process is highly customizable. See Customize Installation section for more information.
Best Practices
Step 0. Install MMCV using MIM.
pip install -U openmim
mim install mmcv-full
Step 1. Install MMDetection as a dependency.
pip install mmdet
Step 2. Install MMOCR.
Case A: If you wish to run and develop MMOCR directly, install it from source:
git clone https://github.com/open-mmlab/mmocr.git
cd mmocr
pip install -r requirements.txt
pip install -v -e .
# "-v" increases pip's verbosity.
# "-e" means installing the project in editable mode,
# That is, any local modifications on the code will take effect immediately.
Case B: If you use MMOCR as a dependency or third-party package, install it with pip:
pip install mmocr
Step 3. (Optional) If you wish to use any transform involving albumentations (For example, Albu in ABINet's pipeline), install the dependency using the following command:
# If MMOCR is installed from source
pip install -r requirements/albu.txt
# If MMOCR is installed via pip
pip install albumentations>=1.1.0 --no-binary qudida,albumentations
We recommend checking the environment after installing `albumentations` to
ensure that `opencv-python` and `opencv-python-headless` are not installed together, otherwise it might cause unexpected issues. If that's unfortunately the case, please uninstall `opencv-python-headless` to make sure MMOCR's visualization utilities can work.

Refer
to ['albumentations`'s official documentation](https://albumentations.ai/docs/getting_started/installation/#note-on-opencv-dependencies) for more details.
Verify the installation
We provide two options to verify the installation via inference demo, depending on your installation method. You should be able to see a pop-up image and the inference result upon successful verification.
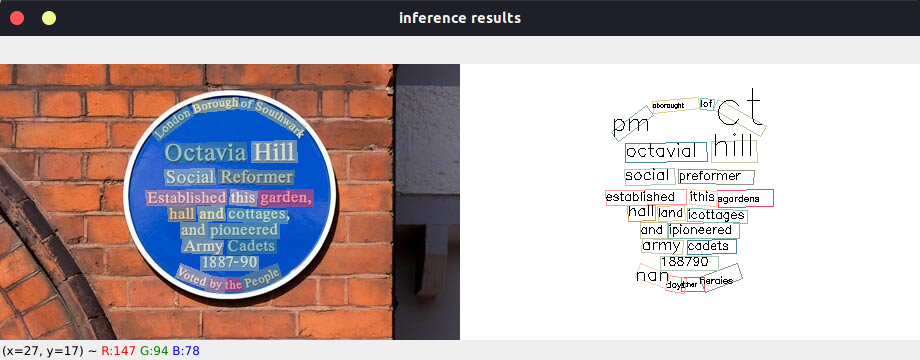
# Inference result
[{'filename': 'demo_text_det', 'text': ['yther', 'doyt', 'nan', 'heraies', '188790', 'cadets', 'army', 'ipioneered', 'and', 'icottages', 'land', 'hall', 'sgardens', 'established', 'ithis', 'preformer', 'social', 'octavial', 'hill', 'pm', 'ct', 'lof', 'aborought']}]
Case A - Installed from Source
Run the following in MMOCR's directory:
python mmocr/utils/ocr.py --det DB_r18 --recog CRNN demo/demo_text_det.jpg --imshow
Case B - Installed as a Package:
Step 1. We need to download configs, checkpoints and an image necessary for the verification.
mim download mmocr --config dbnet_r18_fpnc_1200e_icdar2015 --dest .
mim download mmocr --config crnn_academic_dataset --dest .
wget https://raw.githubusercontent.com/open-mmlab/mmocr/main/demo/demo_text_det.jpg
The downloading will take several seconds or more, depending on your network environment. The directory tree should look like the following once everything is done:
├── crnn_academic-a723a1c5.pth
├── crnn_academic_dataset.py
├── dbnet_r18_fpnc_1200e_icdar2015.py
├── dbnet_r18_fpnc_sbn_1200e_icdar2015_20210329-ba3ab597.pth
└── demo_text_det.jpg
Step 2. Run the following codes in your Python interpreter:
from mmocr.utils.ocr import MMOCR
ocr = MMOCR(recog='CRNN', recog_ckpt='crnn_academic-a723a1c5.pth', recog_config='crnn_academic_dataset.py', det='DB_r18', det_ckpt='dbnet_r18_fpnc_sbn_1200e_icdar2015_20210329-ba3ab597.pth', det_config='dbnet_r18_fpnc_1200e_icdar2015.py')
ocr.readtext('demo_text_det.jpg', imshow=True)
Customize Installation
CUDA versions
When installing PyTorch, you need to specify the version of CUDA. If you are not clear on which to choose, follow our recommendations:
- For Ampere-based NVIDIA GPUs, such as GeForce 30 series and NVIDIA A100, CUDA 11 is a must.
- For older NVIDIA GPUs, CUDA 11 is backward compatible, but CUDA 10.2 offers better compatibility and is more lightweight.
Please make sure the GPU driver satisfies the minimum version requirements. See this table for more information.
Installing CUDA runtime libraries is enough if you follow our best practices, because no CUDA code will be compiled locally. However if you hope to compile MMCV from source or develop other CUDA operators, you need to install the complete CUDA toolkit from NVIDIA's [website](https://developer.nvidia.com/cuda-downloads), and its version should match the CUDA version of PyTorch. i.e., the specified version of cudatoolkit in `conda install` command.
Install MMCV without MIM
MMCV contains C++ and CUDA extensions, thus depending on PyTorch in a complex way. MIM solves such dependencies automatically and makes the installation easier. However, it is not a must.
To install MMCV with pip instead of MIM, please follow MMCV installation guides. This requires manually specifying a find-url based on PyTorch version and its CUDA version.
For example, the following command install mmcv-full built for PyTorch 1.10.x and CUDA 11.3.
pip install mmcv-full -f https://download.openmmlab.com/mmcv/dist/cu113/torch1.10/index.html
Install on CPU-only platforms
MMOCR can be built for CPU-only environment. In CPU mode you can train (requires MMCV version >= 1.4.4), test or inference a model.
However, some functionalities are gone in this mode:
- Deformable Convolution
- Modulated Deformable Convolution
- ROI pooling
- SyncBatchNorm
If you try to train/test/inference a model containing above ops, an error will be raised. The following table lists affected algorithms.
| Operator | Model |
|---|---|
| Deformable Convolution/Modulated Deformable Convolution | DBNet (r50dcnv2), DBNet++ (r50dcnv2), FCENet (r50dcnv2) |
| SyncBatchNorm | PANet, PSENet |
Using MMOCR with Docker
We provide a Dockerfile to build an image.
# build an image with PyTorch 1.6, CUDA 10.1
docker build -t mmocr docker/
Run it with
docker run --gpus all --shm-size=8g -it -v {DATA_DIR}:/mmocr/data mmocr
Dependency on MMCV & MMDetection
MMOCR has different version requirements on MMCV and MMDetection at each release to guarantee the implementation correctness. Please refer to the table below and ensure the package versions fit the requirement.
| MMOCR | MMCV | MMDetection |
|---|---|---|
| main | 1.3.8 <= mmcv <= 1.7.0 | 2.21.0 <= mmdet <= 3.0.0 |
| 0.6.0 | 1.3.8 <= mmcv <= 1.6.0 | 2.21.0 <= mmdet <= 3.0.0 |
| 0.5.0 | 1.3.8 <= mmcv <= 1.5.0 | 2.14.0 <= mmdet <= 3.0.0 |
| 0.4.0, 0.4.1 | 1.3.8 <= mmcv <= 1.5.0 | 2.14.0 <= mmdet <= 2.20.0 |
| 0.3.0 | 1.3.8 <= mmcv <= 1.4.0 | 2.14.0 <= mmdet <= 2.20.0 |
| 0.2.1 | 1.3.8 <= mmcv <= 1.4.0 | 2.13.0 <= mmdet <= 2.20.0 |
| 0.2.0 | 1.3.4 <= mmcv <= 1.4.0 | 2.11.0 <= mmdet <= 2.13.0 |
| 0.1.0 | 1.2.6 <= mmcv <= 1.3.4 | 2.9.0 <= mmdet <= 2.11.0 |